Building Blocks of Angular Apps
Components
- Component encapsulates the data, the HTML markup and the logic for a
view, which is the area of the screen that a user sees

A real world application might looks like this:
- it might have a sidebar component, a navbar component and course components

- it might have a sidebar component, a navbar component and course components
Every application has at least one component which we call
App ComponentorRoot Component. A real world Angular app is essentially a tree of Components:

Modules
- A module is a container for a group of related Components
- Every Angular app has at least one module which we call
App Module - A real world application can have different modules and each module is responsible for a specific areas of our application
- In each module, we will have a bunch of related Components

Components
- Step 1: Create a component
- Step 2: Register component in a module
- Step 3: Add an Element in a HTML markup
Step 1: Create a Component
- Open the project
- cd to the
hello-worldproject - run
ng serve --open
- cd to the
- Create a file
- go to
src\appfolder and create file named "courses.component.ts"
- go to
- Convert the class into Component
- Import a
Decoratorcalled Component from Angular core library
- Import a
import { Component } from '@angular/core';
- Apply Component to the TypeScript class
- Use the
Decorator functionComponent and pass in an object to tell Angular how this component works - The object has the following properties:
selector: css-style element e.g. courses, .courses, #coursestemplate: HTML markup we want to render for this component. If the template is an external file, we usetemplateUrlinstead
- Use the
@Component({
  selector: 'courses',
  template: '<h2>Courses</h2>'
})
- With Components, we can extend HTML vocabulary so we can define new elements like <courses>. Angular will then render the
templatefor this component inside thatselectorelement
Step 2: Register Component in app.module
- The Decorator function
@NgModuleis used to convert a TypeScript class to a Module

- By default, when we generate an app, we have one Component called
AppComponentwhich is part of theapp module - The property
declarationswhich is where we add all the Components that are part ofapp module

- When you type "CourseComponent" inside
declarations, VS code automatically insert the "import ..." at the top - Note that the name of a module is just the name of the file without the extension
Step 3: Add an Element in a HTML Markup Template
- Inside the "app" folder, the file
app.component.htmlis an external template for our "AppComponent" - This is the homepage at url
localhost:4200 - Clear contents of "app.component.html"
- Add the custom element "courses"
// File: app.component.html
<h1>Angular</h1>
<courses></courses>
- When Angular sees the <courses> element, it is going to render the template of our "courses" component
- Our homepage had been changed as follow:

Example: App-Root Component
- At the browser, right click and select
Inspect Element

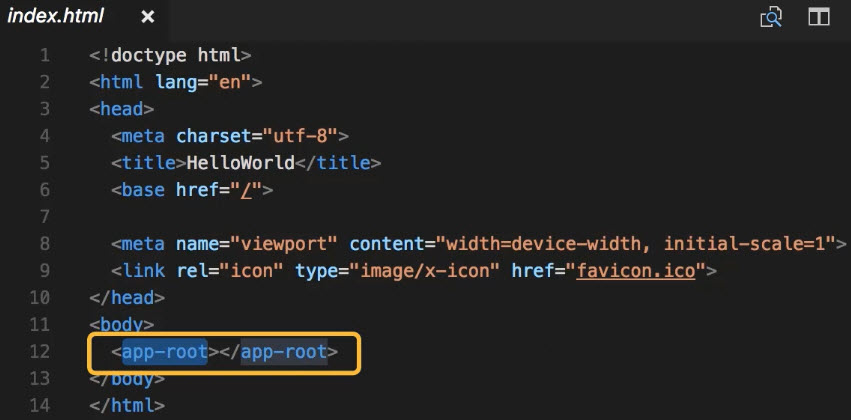
- The <app-root> is found inside the <body> Where does it come from?
- <app-root> is a custom element and is from
src/index.html

- From Angular point of view, we should have an component with a selector for this element
- We can locate them in
app/app.component.ts

- Note that the template file
app.component.htmlis external
Naming Convention
Component File
- file name:
[name].component.ts - Note if the Component has multiple words, we separate them using a hyphen e.g. courses-form.component.ts
Class Name
- class name:
[Name]Component - Use the Pascal naming convention
- First letter of every word should be capital
- Use the suffix
Componentin the name of the class
Generating Components Using Angular CLI
- The 3-step approach in the previous section is a little bit tedious and if you miss a step, the applicaton is going to break
- Using Angular CLI is a quicker and more reliable way to create an Angular component
- At the command prompt, type the following
ng g c course
where "g" is short for "generate" and "c" is short for "component"

Angular-CLI created a folder called "course" and add 4 files inside the foler: a CSS file, a HTML file, a unit test file and a TypeScript file. It also registered the component in AppModule.
Interpolation
- Refer to file "courses.component.ts"
- We want to define a field in this class to hold the title of this page and display the title dynamically
- Use
Interpolationsyntax{{title}}to render title dynamically- The "title" field will be evaluated at run-time and the value of this "title" field will be placed in our DOM
- This is known as
Data Bindingin which you bind a view to a field in this component - Besides field, we can also bind Javascript expression, method etc.
import { Component } from '@angular/core';

@Component({
  selector: 'courses',
  template: '<h2>{{ getTitle() }}</h2>'
})

export class CoursesComponent {
  title = "List of courses";

  getTitle(){
    return this.title;
  }
}
Directives
- Instead of displaying a single "title" field, you wan to display a list of courses:
- Declare and initialize an array "courses"
- Enclose "courses" with
back tickso that the list can be spanned multiple lines - Use directives
*ngForwithstring interpolationto manipulate the DOM
import { Component } from '@angular/core';

@Component({
  selector: 'courses',
  template: `
    <h2>{{ title }}</h2>
    <ul>
      <li *ngFor="let course of courses">
        {{ course }}
      </li>
    </ul>
  `
})

export class CoursesComponent {
  title = "List of courses";
  courses = ["course1", "course2", "course3"];

}
Services
- In real world applications, most of time we get these courses from the server
We implement above by:
Add logic for calling an HTTP service

Issues:
- Make a fake HTTP Endpoint for unit testing purpose
- Repeat the logic for different components
- A component should not include any logic other than presentation logic
- Angular uses Services to implement this kind of logic
- Create a new file
app\courses.service.ts
- Create a new file
- Services is a plain TypeScript class with no Decorator
// File courses.services.ts
export class CoursesService{
  getCourses(){
    return ["course1", "course2", "course3"];
  }
}
Dependency Injection
Implement Services Using 'new' Operator
- To enable the use of "CoursesService" in "CoursesComponent"
- Add
constructorto class CoursesComponent- This will create an instance of our courses service
- As you instantiate courses service with
new, note that import statement is automatically added to the top of courses component

- Then we can initiate the "courses" field
// File: courses.component.ts (partial)
export class CoursesComponent {
  title = "List of courses";
  courses;

  constructor(){
    let service = new CoursesService();
    this.courses = service.getCourses();
   }
}
However, there are problems with this implementation:
- When we use the
newoperator, we havetightly coupledthe class ("CoursesComponent") with its implementation ("CoursesService")- In a bigger picture, if we implement the logic for consuming an HTTP service ("CoursesService") DIRECTLY inside a component ("CoursesComponent"), we can't unit test this class
- Hard to maintain future changes on the service constructor e.g. add a parameter will lead to multiple changes in application code
A Better Way to Implement Services
- Step1: Add the dependency ("CoursesService") as a parameter to the constructor of the component ("CoursesComponent")
- Benefits:
- With this implementation, future changes on CoursesService is easy to maintain
- Also we can provide a "fake" implementation of CoursesService that doesn't use HTTP service at the back-end in unit testing
- In other words, we have
decoupledthe class ("CoursesComponent") from its dependency ("CoursesService")
- Benefits:
// File: courses.component.ts (partial)
export class CoursesComponent {
  title = "List of courses";
  courses;

  constructor(service: CoursesService){
    this.courses = service.getCourses();
   }
}
Step2: Register "CoursesService" as a provider in app module
- Instruct Angular to inject the dependencies of a component into its constructor (
Dependency Injection) Angular has a dependency injection framework built in to it. In order for that to work, you need to register the dependency ("CoursesService") in as a
providerinAppModule:
If you miss this step, the console will give you an error -
Error: No provider for CoursesService
- Instruct Angular to inject the dependencies of a component into its constructor (
Singleton
- When you register a dependency as a provider that module, Angular will create a single instance of that class (Singleton)
- Angular will pass the singleton to components that require the services
Generating Services Using Angular CLI
- A quick way to create a service in Angular
ng g s email
- "s" is for "service"
- We don't need to type "email.service"
- This will generate 2 files for us:

- The file "email.service.spec.ts" includes some boilerplate codes for writing unit test for that service

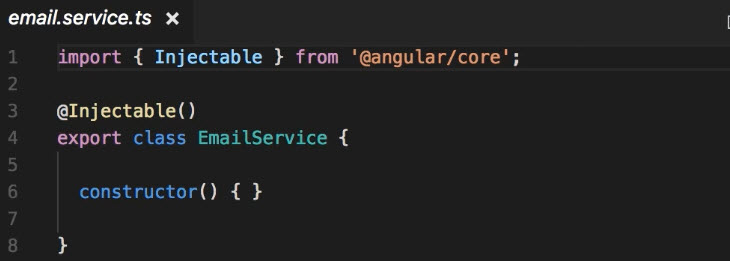
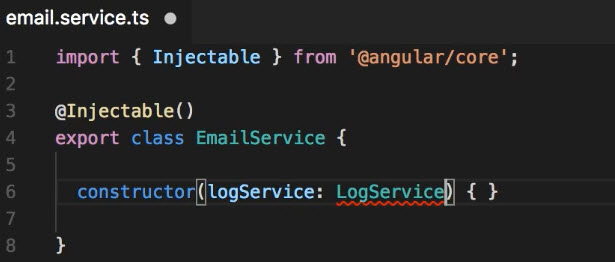
@injectableis a decorator function which is required ONLY if this service had denpendency in its constructor- This tells Angular that this class ("EmailService") is an
injectible classwhich means Angular should be able to inject dependency of this class into its constructor
- This tells Angular that this class ("EmailService") is an

- We did not use
@injectabledecorator when defining components because when we use the@componentdecorator, that decorator internally includes these@injectabledecorator